Showing posts with label eat well. Show all posts

Thursday, July 21, 2011

Three-peat {Chicken Dinners}


Abbie's back sharing some yummy ideas for Summer suppers.

This is one of my very favorite summer eats. It's so yummy and easy. And this one recipe can turn into three super delicious meals for our little family of four. Bonus! I'm all about making leftovers look new.

The Chicken

Crockpot BBQ Chicken

6 chicken breasts

12 oz bottle of BBQ sauce

1/2 cup Italian salad dressing

2-3 Tbsp brown sugar (adjust for sweetness)

2 Tbsp Worcestershire sauce

1/2 - 1 tsp of chili powder (optional kick)


DIRECTIONS

Put chicken in a crockpot. Mix remaining ingredients in a bowl and pour mixture over the chicken. My crockpot cooks this in 4-5 hours on low.


Dinner 1 - Serve chicken with wild rice and steamed veggies. Our favorite farmer's market picks for this meal are zucchini, yellow squash and red bell peppers.


Dinner 2 - Shred leftover chicken. Serve sandwich style on a hearty bun with corn on the cob, broccoli slaw (I buy a bag and put some Brianna's poppy seed dressing on it), and sweet potato fries or sweet potato chips if you're avoiding the oven (but sometimes sweet potatoes fries are worth the heat. I have a major crush on this RECIPE).


Dinner 3 - Take remaining shredded chicken and put on a bed of greens. Top with black beans, avocado, tomato, cucumber, cheddar, and dressing.


Hope you enjoy!


Friday, July 15, 2011

The Friday Fray

My grandma lives right around the corner from me which is just one of the happiest things in my life. I adore her. Sometimes she invites us over for dinner - last weekend we ate with her and she served a delicious salad. We eat a lot of salad, so I'm always happy to find a new variation. Thought you might like the recipe...

Salad de Maison
(Yields 8 Servings)

2 heads romaine lettuce, washed and torn
2 c. cherry tomatoes, halved
1 c. swiss cheese, cubed or coarsely grated
1/3 c. parmesan cheese, shredded
2/3 c. slivered almonds, toasted
1/4 lb. cooked bacon, crumbled

I especially love this simple dressing:

Dressing
(best if made several hours ahead of time)

Juice of 1 lemon
1 tsp. salt
3/4 c. olive oil
3 cloves garlic
1/2 tsp. pepper

Top with croutons.


I hope you love that recipe.

On a somewhat more personal note, I've been spending a lot of time cleaning and then re-cleaning the same rooms and trying not to get frustrated about the fact that nothing stays done. Nothing. I know lots of people say, "just let the house go when your kids are little... blah, blah, blah." I can't do that. I need order. I don't coexist well with clutter. I'm a happier, nicer mom when the house is tidy. So I'm looking for that ever-elusive balance of what to let go and what to insist on. I need to do a better job of teaching/training the kids to clean up after themselves. I know to some degree I enable them because I get so sick of the mess, and I want so badly to avoid the conflict, that I just clean it up myself. Not so good.


Anyway, I hope you're finding answers to all of your parenting quandaries.
And I hope you're invited to a wonderful event this weekend and I hope the hostess asks you to bring the salad because {ding!} ... you're all set!


xoxo
em

Thursday, July 14, 2011

Hippie Popcorn


Woohoo! We're back! We've been on the road. I hope to share some thoughts and pics about our travels, but frankly, we're still playing catch up, plus it's my sweetheart's birthday. So that will have to come later.

For today, I'm sharing our favorite summer snack (OK, also our favorite anytime snack). When it's light until 9:30 PM, bedtime gets pushed back a little. Nothing motivates my boys to clean up the playroom like a little movie and popcorn.

But not just any popcorn. When my husband and I first started dating he introduced me to the way they eat popcorn here in Ashland. Let me tell you, there is no going back.

Friends, meet nutritional yeast (also called brewer's yeast):


You can purchase it in the bulk section at lots of grocery and health food stores. I keep mine in an old PB jar.

A little freshly popped popcorn, some melted butter, salt, and nutritional yeast= DELISH. (If you're feeling guilty about the butter, keep in mind that the yeast contains every essential amino acid. Totally worth it!) Our preferred accompanying beverage? OJ!


enjoy!
xoxo
anne

Wednesday, June 29, 2011

Cabbage Salsa


This is such a fresh, unique summer dip. And a great way to eat cabbage. Every time we serve it people love it.

1 head green cabbage
green onion (2 or 3 finely chopped)
peppers (red or yellow, diced)
tomato (diced)
1/2 bunch of cilantro (more if you like it)
black beans, black eye peas (1 can each, drained and rinsed)
Mezzetta tamed jalapenos (chopped)
1 c. white vinegar
1 Good Seasons Italian Dressing Mix (click the link to see what the packet looks like)
couple tablespoons of jalapeno juice
fresh lime juice

Chop it all up. Mix up dressing packet with vinegar, jalapeno juice & lime juice. Toss and serve with tortilla chips.

I'm sorry that these ingredients and amounts are not precise - start with as much cabbage as you'd like and adjust the other ingredients accordingly so you have a nice variety of textures in each bite. Feel free to leave questions in the comment thread.


Mmmmmmm, summer!

Tuesday, June 28, 2011

{Best!} Strawberry Pie for the 4th!

Photobucket
Independence Day is upon us! And because I love you as much as I love my country, I'm dishing out the family recipe for strawberry pie. I'll tell you what--nothing else I make elicits such oohs and ahhs and recipe requests. This is the clear winner.

For the pie crust {Special shout out to my mom for teaching me the ways of pie crustery!}:
2 cups flour
1 tsp. salt
1/2 cup veg. oil
3 T cold water

Mix flour and salt. Add oil, mix with fork until well blended, like fine crumbs. Sprinkle with water and mix with fork. Gather dough and press into 2 balls--one with 2/3 of the dough, the other with 1/3 of the dough. Set aside smaller ball. Roll large dough ball between two pieces of waxed paper (wet counter underneath to prevent slipping of paper). Peel off top paper. Place pie dish on top of crust and flip it over so crust is now inside the dish. Peel off remaining waxed paper. Trim or flute crust as you like. Prick crust with fork to allow air. Bake at 450 deg. for 12-15 minutes.

On a floured surface, roll out small dough ball. Cut out stars with cookie cutter (hearts would be darling for V-day or you could spell something like I did on Mother's Day). Place stars on cookie sheet and sprinkle them lightly with sugar. Bake at 450 deg. for 10-12 minutes.

For the pie filling:
1 cup sugar
2 T cornstarch
1 quart fresh strawberries, coarsely sliced
(it's even more fun if you can get small local berries and leave them whole!)
1 T butter
1 small package strawberry gelatin (don't be afraid of the jello, it just helps the pie set up!)
1 T lemon juice

Mix sugar and cornstarch in a saucepan. Mash 1 cup of the berries and add water to make 2 cups. Stir into sugar mixture. Cook and stir until boiling. Boil 2 minutes. Remove from heat and add butter, jello, and lemon juice. Stir to dissolve jello. Chill mixture until partly set. (When I'm in a hurry I admittedly skip this step!) Spoon a third of mixture into baked pie shell. Top with remaining sliced berries. Cover with remaining mixture. Place baked stars on top. Chill. (I like it on the softer side; if you chill it too long the jello sets up too hard.)

We typically serve this pie with vanilla ice cream. Last year we served it with honey flavored Greek yogurt which was to die for!

Hope you love it!
--Anne

Sunday, June 5, 2011

BEST Butter cream


I've posted this before, but it remains a topic of emails and friends' inquiries.

What is the recipe for the best butter cream frosting?

Memorize this ratio:

1 stick butter (room temp) to 1 1/2 cups powdered sugar to 1 tablespoon milk

(Cream butter and sugar first, then add milk.)

Now that you know the ratio, you can make as big a batch as you need. For a batch of 24 cupcakes, I would double it if I were spreading frosting with a knife, and triple it if I were piping the frosting out with a pastry bag.

As far as flavor is concerned, you can add vanilla (even better: vanilla bean paste!), mint extract, coconut extract, etc. (Use your own taste buds to know how much!)

When you need this recipe, it'll be right over there on our sidebar, along with a few other BESTS that we think you ought to have on hand.

love and cupcakes,
anne

Tuesday, May 3, 2011

Blueberry Stuffed French Toast


Here's a yummy recipe from Bloom reader Sarah Sievers. You may want to request it for your Mother's Day breakfast. We're excited to share all the lovely submissions we received for our May celebration...stay tuned!


Blueberry-Stuffed French Toast

16 slices of firm white bread (I like to use french bread from the bakery and slice it myself.)
1 pkg Neufchatel cheese, softened (fancy "cream cheese")
1 pint blueberries, divided
3 cups milk
3 eggs
1/3 cup maple syrup
1 tsp. vanilla extract
1 1/2 cups sugar, divided
2 Tbs. cornstarch
1 Tbs. butter

Butter a 3 quart baking dish. Cut 10 slices of bread into 3/4" cubes. Spread cheese over 1 side of the remaining slices of bread and arrange them cheese side up in the baking dish. Sprinkle with 1 c. blueberries. Top with bread cubes. Combine next four ingredients (milk, eggs, syrup, vanilla) and 1/4 c. sugar. Pour over bread mixture. Cover; refrigerate over night.

Preheat oven to 350. Mix nutmeg and 1/4 c. sugar; sprinkle over bread mixture. Cover with foil and bake 30 min.

Remove foil and bake until top is golden brown and inserted knife comes out clean, 20-30 min.
Let stand 5 min. before serving.

Meanwhile, in a pot, mix cornstarch, 1c. water, and remaining sugar (1c.) Over medium heat, bring to a simmer. Cook until thickened, about 3 minutes.
Remove from heat. Stir in butter and the remaining blueberries. Serve with french toast.

*Makes 10 servings.


Tuesday, April 19, 2011

Best Banana Bread

This recipe is so good you'll be begging your bananas to hurry up and turn spotty and brown.
Make a loaf one of these rainy April afternoons! Here's how:

1/2 c. butter
1 c. sugar
2 eggs
1 c. mashed bananas (about 2 large bananas)
1/4 c. milk
1 t. lemon juice (I like to be a little generous with this, I think it's the secret ingredient)
2 c. flour
1 1/2 t. baking powder
1/2 t. baking soda
1/4 t. salt
1/2 c. chopped walnuts or pecans
* Sometimes we like to add chocolate chips, too, but then it feels really sinful to eat it for breakfast the next morning...so, think on that one...

Cream butter and sugar
Add eggs and mix
Add bananas, milk and lemon juice

Sift dry ingredients & add nuts

Bake at 350 in well greased loaf pan for 1 hour.


**** Also, don't forget to send us your submissions on any aspect of motherhood/womanhood for our month-long May celebration. Read more about it here. Many thanks to those of you who have already sent contributions. We're excited about what's taking shape. And please don't feel like these have to be touched up and rose-colored, we just want them to be honest and real.
Send your thoughts to: aplacetobloom at gmail dot com ****

Monday, March 28, 2011

Kid Friendly Whole Food Recipes with Mel of Mel's Kitchen Cafe


Could we be any luckier than to start the week with a guest post from Mel of Mel's Kitchen Cafe? Pro'lly not. We've talked a bit about cooking with whole foods lately, dismissing fears about eggplant, showing you what to do with kale, and proving that it's a snap to make your own hummus. Today Mel's sharing two kid-friendly, meatless recipes that incorporate super healthy ingredients like sweet potatoes and jicama. Awesome.

I don’t know about you, but I’m constantly trying to find new ways to get more vegetables and whole foods into my family’s diet. Enter two of our favorite vegetarian meals. Let me detail a few of their merits:

a) quick
b) healthy
c) vegetable-laden
d) potential for major ego boost when your family gobbles them up and makes you feel like chef of the year for giving them a week’s worth of veggies in one meal.

Now, I know I’m going to get this question: “Do your kids really eat this stuff?” And I’ll answer it for you. Yes. But that’s a loaded “yes.” Let me tell you what I do to get them excited about fare such as this. Because these are the types of meals that are easy to put together, I let my kids make their own. I lay out all the ingredients and give them a tortilla and say, “Go to town!” which basically translates into, “You can make your own quesadilla/wrap but you have to choose at least four of the vegetables (for the wraps)/two spoonfuls of the sweet potato mixture (for the quesadillas).” They get so wrapped up in the excitement of making their own that they usually don’t fight about the rules of the game. And amazingly they gobble up food they make much better than if I shoved a loaded vegetable wrap in their face that I made with my own hands and ordered them to eat up.

First up, the Sweet Potato Quesadillas. I’m not lying, friends, when I tell you that these are the most delicious quesadillas I’ve ever devoured. I was the ultimate skeptic when I first thought about making them. I’m not a huge sweet potato fan, I have to be honest here. And the only reason I figured it might be worth a try is that there were no marshmallows called for in the recipe. I’m sorry but the sweet potato/marshmallow holiday mixtures make me a teensy weensy bit vomitous. (I hope you can all still love me.)

For these quesadillas, the tender, mashed sweet potatoes are mixed with a sautéed mixture of absolute flavor: garlic, onion, red pepper and green chiles. Add in a bit of fresh cilantro for a pop in taste and these are out of this world. The blue cheese is entirely optional, but for me (I happen to be a blue cheese lover), it made the quesadilla. A perfect balance of flavor, these quesadillas are dee-vine.


Sweet Potato Quesadillas

*Makes 6 quesadillas

1 tablespoon extra virgin olive oil
1 medium red pepper, seeded and chopped, for about 1 cup
1 medium yellow onion, chopped, for about 1 cup
2 cloves garlic, minced
1 large poblano chile, roasted and chopped, or 1 small can chopped green chiles
2 large sweet potatoes (about 1-1/2 pounds), cooked, peeled, and mashed, for about 3-4 cups
¼ cup chopped fresh cilantro
1/4 cup blue cheese, crumbled
1 teaspoon salt
12 (8-inch) flour or corn tortillas
1 ½ cups Monterey Jack cheese, grated (can also use Pepper Jack cheese for an extra kick)

In a large skillet, heat the olive oil over medium heat until hot and rippling. Add the red pepper, onion, and garlic, and sauté, stirring often, until the onion is translucent and pepper is crisp tender, about 4-5 minutes. Stir in the poblano chile or can of green chiles, if using.

Mix the mashed sweet potatoes with the red pepper mixture. Add the cilantro, blue cheese, if using, and salt. Blend well.

Place 1/2 cup of the sweet potato mixture in the center of a tortilla, and spread the mixture out evenly to within 1/2 inch of the outer edge of the tortilla. Sprinkle with 3 tablespoons of the Monterey Jack cheese. Place another tortilla over the filling. Repeat with the remaining tortillas until all of the filling is used.

Cook the quesadillas on a preheated griddle or skillet until browned and crispy and the filling is hot and cheese is melted, about 2-3 minutes each side. Alternately, you can preheat the oven to 350 degrees and lightly grease a baking sheet with cooking spray. Bake the quesadillas for about 5-7 minutes, until the filling is hot and cheese is melted.

Now for the Santa Fe Veggie Wraps. Simple, both in prep and concept, these can be absolutely tailored with the veggies your family loves and prefers. The point is to load them with a variety of vegetables. If you have never used jicama, I encourage you to try. The crisp, slightly sweet flesh is similar in texture to a water chestnut and it’s unique texture gives these wraps a delicious crunch.

Santa Fe Vegetable Wrap (pictured at top of post)

*Makes 6 large vegetable wraps

6 (12-inch) whole wheat tortilla, any flavor
6 ounces light cream cheese, softened
¼ teaspoon chili powder
¼ teaspoon cumin
Pinch of salt and pepper
1 large head red or green leaf lettuce
Pepper jack or sharp cheddar cheese, sliced
2-3 tomatoes, thinly sliced
2 avocadoes, thinly sliced
½ red onion, thinly sliced
1 medium jicama, thinly sliced
1 cup fresh or frozen corn kernels, thawed (if frozen)
1 can black beans, rinsed and drained

In a small bowl, mix together the cream cheese with the chili powder, cumin and salt and pepper. Spread each tortilla with an even amount of the cream cheese mixture. Top the cream cheese with lettuce, cheese, tomatoes, avocadoes, onions, and jicama. Spoon corn and black beans evenly over the top. Roll up tightly. Slice in half diagonally and serve.

Thanks, Mel. I'm just sitting here salivating, wishing it were dinner time. I'm going to make those wraps tonight ... yummm!

Thursday, March 3, 2011

Whole Foods: Falling in Love with Hummus by Bloom Guest Kami


Today's guest, Kami, is passionate about excellent nutrition and feeding her family a whole foods diet. She writes thoughtful and informative posts about these topics at her blog, Finding My Niche. We're happy to have her at Bloom to teach us a thing or two about hummus (yum!)

Hummus is one of my favorite easy, healthy snacks (or small meals even!). It's a simple puree of garbanzo beans and spices. The garbanzo beans provide an excellent source of fiber which digests slowly and keeps blood sugar from rising too rapidly. Pair them with whole grains or rice, and you've got yourself a complete protein. Garbanzo beans also contains a trace mineral called molybdenum, which helps the body detoxify sulfites. They also contain iron and manganese which are essential for healthy blood and high energy. Olive oil provides a good fat, which will help keep you full. Fresh, raw garlic provides immune boosting properties to keep your body healthy and strong. Basically, this is a wonderful dish that provides excellent nutrition and involves very little work and delivers a lot of taste!

This is the perfect dip to bring to parties along with a platter of raw veggies. But don't just save this for parties! Use it as an every day staple in your house. When kids are hungry (especially before dinner), pull out the hummus, veggies, and whole grain crackers and you've got a simple, quick meal that will leave them satisfied along with giving them excellent nutrition. My almost-three year old, who has never touched raw vegetables, now eats broccoli ("little green trees"), cauliflower ("little white trees") and carrots quite happily if he can dip them into hummus - take away the hummus and there's no way he'd eat them! Providing simple, healthy snacks like this over time will help your family gain an appreciation for the taste of delicious, whole foods.

Hummus

2 cups garbanzo beans
just under 1/3 cup tahini
4-6 tablespoons fresh lemon juice (that's about 1 1/2 lemons)
1 teaspoon salt
2-3 cloves garlic
1 tablespoon olive oil
dash of paprika

Combine all ingredients in food processor and puree until smooth and creamy. Serve alongside fresh vegetables, whole grain crackers or pita bread, as a topping for falafel, or as a sandwich spread. The possibilities are endless!

Thursday, February 17, 2011

Cooking With Whole Foods: Eggplant

Rachael's making another Bloom appearance (yay!) to teach us a few things about cooking with eggplant. And, of course, sharing yummy recipes, too! Thanks for being here, Rach...

As my family was finalizing Christmas plans this year, my youngest sister remarked that
she was so excited to see everyone, she was even looking forward to “Rachael sneaking
eggplant into everything possible!” I had to chuckle, because I really do love eggplant.
It’s great cooked down into ratatouille, or roasted and pureed into baba ganoush, or as
part of a late summer gratin, but my very favorite way to eat eggplant is grilled on a
pizza. Eggplant is a great candidate for grilling, because it turns soft and deliciously
moist. (I also love to serve it in panini).

Eggplant is very easy to grow, for all of you planning your summer gardens, but if you’re
buying it, look for firm-skinned eggplant that are heavy for their size. Larger eggplant
will generally have more developed seeds, so don’t go for the Goliaths. Overly wrinkled/
shriveled skin indicates an elderly eggplant that doesn’t need to go home with you today.

To grill the eggplant, cut it into even slices about ¼ inch thick. Brush both sides liberally
with olive oil, sprinkle with salt and pepper (the salt really brings out the flavor, but don’t
overdo it!), and grill on a panini press or George Foreman-style grill for 4-5 minutes.
Theoretically you can do this on a BBQ grill as well, but I always, always burn it, so I
stick to the appliances. This same technique also works beautifully for grilling slices of
zucchini (also a great pizza topping or sandwich filler). Eggplant will soak up much
more oil than zucchini, so prep the eggplant just before it goes on the grill, or it will
absorb the oil too quickly. I get the best coverage by using the spray can of olive oil
rather than a pastry brush.

My favorite eggplant-including pizza combo is a dough featured in Martha Stewart
Living a year or two ago (it is honestly the best crust I’ve ever made, and I’ve tried many
a recipe!), plus basil pesto, shredded Parmesan, red onion rings, and the eggplant itself
(or zucchini for those who dislike eggplant, such as my children). Black olives are a fun
addition as well. In summer, I add big slices of heirloom tomato.

Recipes:

Pizzeria Bianco Dough (makes 4 12-inch pizzas)
2 1/4 t. active dry yeast
2 c. warm water (105 to 115 degrees F)
5 to 5 1/2 c. all-purpose flour
2 t. fine sea salt
Extra-virgin olive oil, for greasing bowl

Dissolve yeast in warm water, let stand for 5 minutes. Stir in 3 c. flour and the salt,
stirring until smooth. Stir in additional 2 c. flour, adding flour (up to 1/2 c.) 1 T. at a
time, stirring until dough comes away from bowl but is still sticky (I use my KitchenAid
stand mixer for all this). Continue to knead, by hand or in a mixer, until dough is
smooth, elastic, and soft, but still a little tacky, about 10 minutes by hand or 5 minutes in
a mixer.

Shape dough into a ball and transfer to a lightly oiled bowl; turn to coat. Cover with
plastic, let rise in a warm place until it doubles in volume (2-3 hours; when pressed with
finger the indent should remain).

Place pizza stone in oven and preheat to 500. Scrape dough out of bowl onto floured
surface, cut into 4 pieces, and shape into balls. Dust with flour, and cover with plastic.
Let rest 20-30 minutes until dough relaxes and almost doubles. (Note: you can let the
dough rest in the ‘fridge for a few hours rather than 30 minutes on the counter, making
this a viable after-church meal). Cut 4 pieces of parchment paper to the size of your stone.

Holding top edge of 1 dough ball in both hands, let bottom edge touch work surface.
Carefully move hands around edge to form a circle, as if turning a wheel. Hold dough on
back of your hand, letting its weight stretch into a 12-inch round (my husband likes to
toss it; I can’t do that without tearing it).

Transfer dough to parchment paper. Arrange toppings, then transfer the dough and paper
to the hot stone. Bake pizza for 12 minutes or until crust is crisp and golden brown;
remove from oven with peel and serve hot!

Basil Pesto

1/4 c. olive oil (or cooking oil)
1/2 c. chopped nuts (walnut, almonds, or pine nuts)
2 c. firmly packed fresh basil leaves
1/2 c. grated Parmesan or Romano cheese
4 cloves garlic, peeled and quartered
1/4 t. salt
black pepper

If using a food processor, combine oil, nuts, basil, cheese, garlic, pepper and salt,
processing until nearly smooth. If you're using a blender, it will be easiest to first chop
the basil and nuts before adding them to the mixture.

I like to make huge batches all summer and freeze individual portions for winter use.

Wednesday, February 9, 2011

V-day Peppermint Dessert with Bloom Guest Pamela

Yay! Pamela is back with another Valentine's Day dessert idea!

I grew up eating this dessert during the Christmas Holidays. I loved the marshmallows, pink peppermint and of course the chocolate. But, we have enough treats and candy around the house during Christmas. So....I like to make this dessert for Valentine's Day. And why not? It's pink!!!

Peppermint Dessert:

I make this recipe using two kitchen appliances: my Kitchenaid and Cuisinart. I loved the layer look and I also love that this dessert is no bake. Just out of the freezer and into your mouth. Yum!!

Crust: 2 cups crushed Nilla Wafers
1 cube of Butter (melted)

Don't skimp on the butter. The wafers need to be really moist and soak up all the butter in order to make the layers work. Also, I crush my wafers in my Cuisinart. Place wafers in the bottom of a 9 by 13 pan. Spread and pat with a fork evenly across pan. Place in fridge to start freezing while you make the chocolate.

Chocolate: 1 cup butter or two cubes (softened)
2 cups powdered sugar
6 egg yolks
2 oz. semisweet chocolate (melted)
1/2 cup crushed walnuts

Beat softened butter and powdered sugar until creamy. Add egg yolks and beat again. Because you don't cook this dessert, make sure you don't have any lumps of butter. Melt chocolate in microwave and add, beat again. Fold in walnuts by hand. Layer on top of wafers. Place in fridge to start freezing while you make the peppermint.


Peppermint: 2 cups heavy whipping cream (whipped)
3 cups mini marshmallows
1 cup crushed walnuts
1/2 cup crushed peppermint


Beat cream until cream holds shape, dot not over beat cream because you will do some stirring by hand, so just watch your cream while mixing. I use my Cuisinart to crush the peppermint. I mix the peppermint to a very fine texture, almost like powder. Then fold in marshmallows, nuts and peppermint. Stir until just mixed. Layer on top of chocolate. Place in fridge until hard. About 6 hours, if freezing overnight cover with tin foil.


Thanks again to the wonderful ladies at Bloom for letting me guest post. I hope everyone has a marvelous Valentine's Day.

Pamela is the author of the crafty blog: French Knots. She lives in Utah with her husband and three sons. Her favorite holiday is Valentine’s Day (yes, more than Christmas!!) and her favorite colors are pink and red. When Pamela isn’t crafting with her sons, she is quilting, cooking, reading and or running; not in that order or all at the same time.

Tuesday, January 18, 2011

Cooking with Whole Foods: Kale and Cannellini Bean Soup

After this post and its comment thread evolved, Emily and I got to thinking that we ought to post some recipes that call for simple, healthy ingredients that people are often unfamiliar with to help us all use more whole foods in our cooking.

Today's recipe features the incredibly good-for-you but often mysterious ("what do I do with this?") vegetable, kale. It is simple, super quick, inexpensive, and sooooo tasty. We all gobbled it up in a hurry last night--even my little boys.


Kale and Cannellini Bean Soup

12 oz. bacon, chopped
4-5 cloves garlic, minced
1/2 tsp. red chile flakes
1 (28 oz.) can whole tomatoes, drained and quartered
6 cups chicken broth
2 (14.5 oz) cans cannellini beans, drained and rinsed
1/2 tsp. freshly ground pepper
2 heads roughly chopped kale
freshly grated parmesan cheese

1. Cook bacon over medium-low heat until it renders its fat (look for it to get bubbly), then drain at least half the fat (you choose how much fat you want--you at least need some for the garlic to cook in).
2. Add garlic and chile flakes; cook, stirring often, until garlic turns pale gold. Add tomatoes, broth, beans, and pepper. Cook about 5 minutes.
3. Stir in kale and cook 10 more minutes.
4. Season to taste with salt (you probably won't need any after the bacon and chicken broth!). Divide among serving bowls, sprinkle with parmesan cheese.

Hope you enjoy!
-anne

Wednesday, January 12, 2011

Food Rules


Might I recommend a book for your consideration in this season of diet-starting and food-related resolution making?

Michael Pollan's Food Rules.

Says Pollan, "After spending several years trying to answer the supposedly incredibly complicated question of how we should eat in order to be maximally healthy, I discovered the answer was shockingly simple: eat real food, not too much of it, and more plants than meat. Or, put another way, get off the modern western diet, with its abundance of processed food, refined grains and sugars, and its sore lack of vegetables, whole grains and fruit."

Pollan's rules, which cover everything from quantity of food (not so much) to types of food (things that will rot, mostly plants, especially leaves) to when you should eat (when you're hungry, not when you're bored), are all rooted in common sense. Many of them feel like heirloom wisdom from your great grandmother. But they also seem sort of revelatory and fresh.
Pollan's simplicity and wit give the rules a catchy-ness that sticks. Rule 19, for example, has been in my mind since I read it: "If it came from a plant eat it. If it was made in a plant, do not."

Here's a little sampler to whet your appetite:

Rule 24 - Eating what stands on one leg (mushrooms and plant foods) is better than eating what stands on two legs (fowl), which is better than eating what stands on four legs (cows and pigs).

Rule 14 - Eat foods made from ingredients that you can picture in their raw state or growing in nature.

Rule 46 - Eat 'til your hunger is gone, not 'til you're full.


Food Rules. Good stuff. I think you'll love it.

Monday, December 20, 2010

Sylvia's Chocolate Truffles


Sarah & Christina always have something delicious to share at Frankly Entertaining. Today they're sharing a favorite Holiday goodie with us. Should be tasty!
Thanks for being here, ladies...

We're so excited to be back at Bloom to share one of our favorite Christmas gift recipes. Chocolate is almost universally appealing, and truffles never disappoint!

These were a staple at our house whenever there was entertaining to be done. Our mom could almost always be counted on to bring these super simple treasures to any party. Our mom usually made them plain, semi-sweet chocolate dipped in semi-sweet chocolate. Sometimes she switched the coating to white chocolate, and sometimes she just rolled them in cocoa powder.
These are super rich, so avoid the temptation to make them big. A little bite is usually enough to satisfy people.

As with all things, the quality makes the difference. The better the chocolate you use, the better the end result. However, I reccomend starting with whatever chocolate chips you have on hand and seeing how you like it. I also experiment with flavor add ins. On this batch I used peppermint extract for one half, and orange extract for the other half. The peppermint ones got dipped in melted chocolate and topped with crushed candy cane, and the orange ones got rolled in either cocoa, sprinkles or chocolate shavings.

People are usually impressed because these look like they take a lot of time, but the first stage takes about five minutes, then there's chilling time, the rolling takes about 15 minutes, then there's chilling time, and the decorating takes about fifteen minutes. If you have someone to help, you can cut the rolling and decorating times in half!

These make a really thoughtful neghbor gift, or co-worker gift. You only need to give someone a few, so you get a lot of gifts out of one batch. You can put them in cellophane bags, or box them up. One year I was delayed with neighbor gift by the early arrival of my second son, so instead we took these around for New Years; we attached a bag with two truffles to a mini bottle of Martinelli's and added a sparkler.


Recipe:

Ingredients:
1/3 cup whipping cream
2 Tbsp. sugar
2 Tbsp. butter
1 c. chocolate chips (or any other chocolate you'd like to use)
1 tsp. vanilla

Directions:

1. Put cream, sugar, and butter into a small saucepan over medium heat.
2. Heat mixture until butter melts, or bubbles start to appear around the edge of the pan. You don't want the cream to boil.
3. Remove cream from heat and stir in vanilla.
4. Pour cream mixture over chocolate chips, and stir until smooth. This is where you could add the different flavorings.
5. Put the chocolate mixture into the fridge to cool for about a half an hour. You want the mixture to be firm, but workable.
6. When the mixture is firm, start scooping it out a teaspoonfull at a time.
7. Roll each teaspoon sized piece into a ball, and place back into the fridge for about ten minutes. IF the mixture starts getting too warm to hold its shape, place it back into the fridge for a few mintues.
8. When the individual truffles are cooled it's time to decorate. Let imagination be your guide. Use melted chocolate, sprinkles, a dash os sea salt, or anything else you can think of.
9. Now, take them around the neighborhood and make some new best friends!

Thanks Anne and Emily for letting us come back and share with the Bloom readers. We hope you enjoy this little treat. Be sure to let us know if you come up with any delicious flavor combinations.

Sunday, December 19, 2010

More Holiday Goodies


If you want a big, sweet, beautiful dose of inspiration for your holiday baking, we highly recommend Mel's Sugar Rush over at My Kitchen Cafe. She's got a fantastic variety ranging from Gingerbread with Cinnamon Whipped Cream to Chocolate Haystack Cream Cheese Squares. (My blood sugar went up just reading through all the recipes!) A dozen days of deliciousness. And if you're still hungry for inspiration, dig the Sugar Rush archives from the past two years.

Speaking of archives, we posted some yummy recipes for a Holiday Goody Plate last year - chocolate/caramel dipped pretzels and almond poppyseed bread. I've got that poppyseed bread penciled in on my list of things to bake this season. Don your aprons and stock your pantries, friends - 'tis the season!

Thursday, December 2, 2010

Latkes, Latkes Good to Eat

image via epicurious

Did you know that Hanukkah began last night? As Christians, we feel an important connection to the roots we share with Judaism. We love teaching our children about Hanukkah and reading Hanukkah childrens' stories to them. This year, Blaine and Rog can't get enough of the book Latkes, Latkes Good to Eat by Naomi Howland, and Blaine has been waiting patiently for Hanukkah to begin so we can feast on some latkes of our own.

I just can't say enough about how important it is to teach our children about a variety of cultural traditions. And it's all the more fun when they are tasty traditions. :)

Hanukkah ends December 9th this year. Enjoy hot latkes while you can...

The Recipe (as shared in the book):

3 large potatoes (about 1 pound)
2 eggs
1/4 cup finely chopped onion
1 T finely chopped parsley
1/2 tsp. salt
1/8 tsp. pepper
3 T flour
vegetable oil

1. Peel the potatoes and rinse them in cold water. Grate very fine. Place the grated potatoes in a colander and run cold water over them. (This will keep the potatoes from turning dark.) Using your hands, squeeze out all the water.
2. In a large bowl, beat the eggs. Add the onion, parsley, salt, pepper, and flour. Stir. Add grated potatoes and mix well.
3. Heat a small amount of oil to sizzling in a large frying pan. Drop pancake mixture by the soupspoonful into oil and flatten slightly. Cook until golden brown underneath, turn, and cook on the other side till browned.
4. Eat while still tender but crisp! Latkes are traditionally served with applesauce and/or sour cream.

The Book:

Tuesday, November 16, 2010

Simple, Festive, Delicious Thanksgiving Table


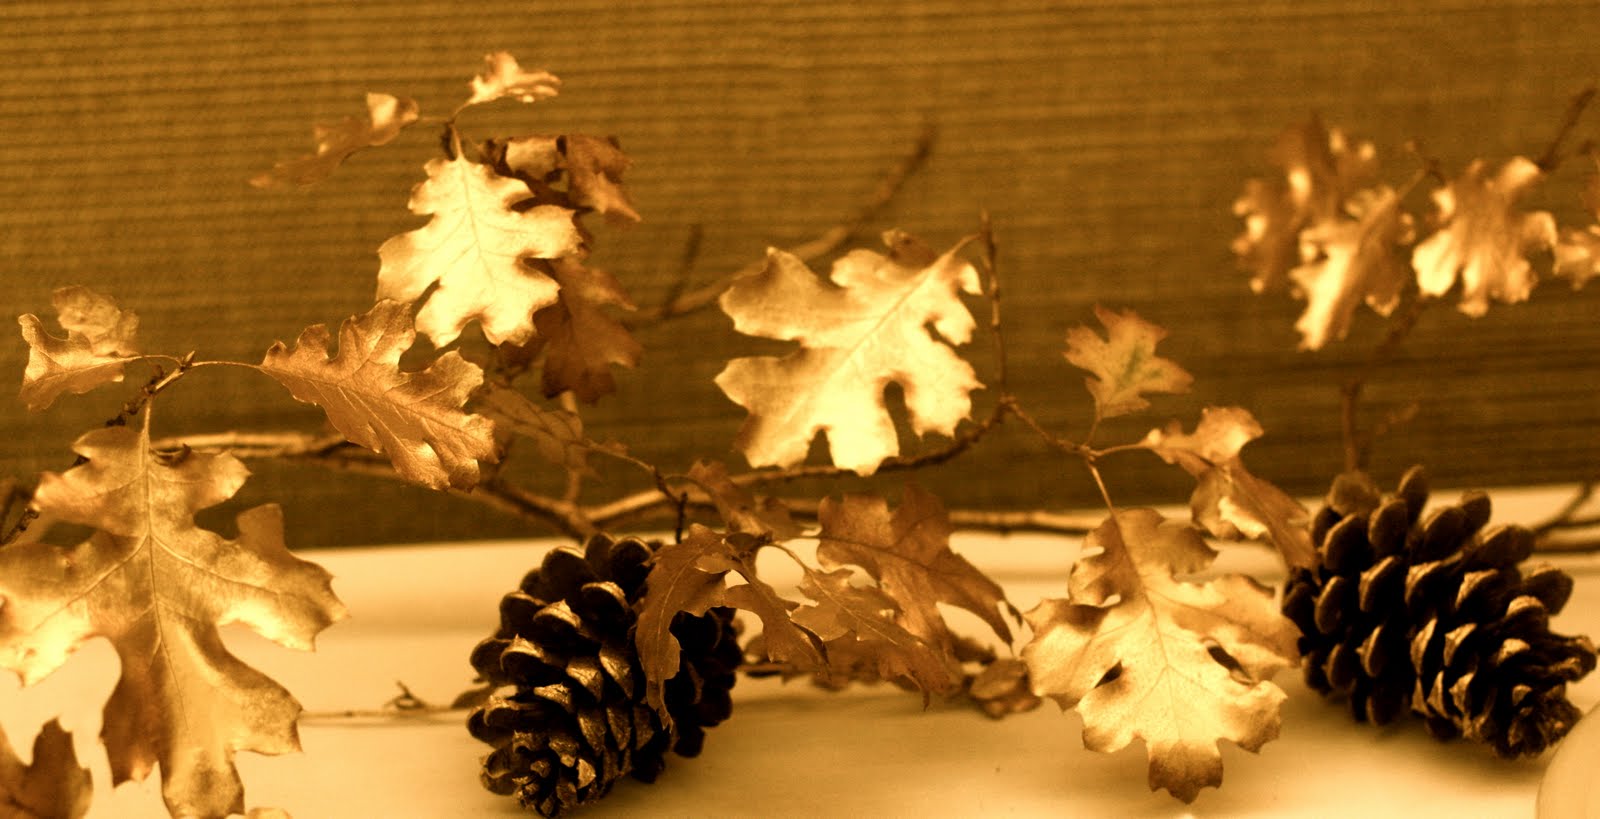
I (Em) recently helped put on an evening for the teenage girls at church. We decided to go with an autumnal theme for the decor and I just wanted to share what lovely centerpieces the girls came up with - and on a shoestring budget, too! Would be a fun Thanksgiving morning activity to send the kids out to forage for the table decor, no?

Autumn leaves and branches, acorns, pine cones, fruit, ornamental gourds, a spool of discount ribbon or some organic twine, a can of gold spray paint and a few glass jars from the recycle bin and you've got the makings for some lovely centerpieces!

Also love this variation on a similar autumn theme that Saran Nielsen featured last Fall.

I (Anne) really loved the T-day decor we used last year, and will probably do a similar thing this time around. I dismantled my mantle display and used it for our table decor. Pots and squash--simple as that.
On this one we also used these wheat topiaries. I love wheat at Thanksgiving--so symbolic of bounty. (Tie wheat with ribbon, place in florist foam in pots, cover foam with moss.)

The kids' table was an enormous hit and we are sure to repeat it every year. I covered the table with paper, drew place mats with crayon, made each child a simple name card, and placed crayons in mini pots around the table. They were entertained for hours. Perfect.

And now for some recipes to top your festive table:


This wild rice and creamy goat cheese stuffing from Mel's Kitchen Cafe looks fantastic.

This Broccoli Gruyere Gratin is to die for.

And for rolls, you can't go wrong with this delish recipe:

Combine 2 cups warm water (about 104 deg.), 2 tablespoons yeast, and 1 tablespoon sugar. Let sit 5 minutes. Add 2 sticks butter (melted and cooled--again about 104 deg.), 3 beaten eggs, 1 cup sugar, 1 1/2 teaspoons salt, and 8 cups flour. Mix and knead dough. Let sit until doubled. Punch down. (I let mine rise in the fridge overnight. If you do this, you have to get the dough to warm up a bit before rolling it out or it is too difficult to work with.)

Take a grapefruit-sized wad of dough and roll it out on a floured surface into a circle that is 1/4-inch thick. With a pizza cutter, cut the circle into 12 triangles. (You'll do this 4 times, making 48 rolls total.)
Roll triangles up from wide end. Place point down onto a greased baking sheet. (You've practiced this technique with Pillsbury Crescent Rolls, right?!) Cover and let rise until doubled. Bake at 375 for 12-14 minutes, until golden.

What do you have planned?
xo,
em and anne

Wednesday, November 10, 2010

Cooking with Pumpkin

Photobucket

I'm about to turn this year's mantle display into all sorts of deliciousness.

This time of year everyone is getting excited for pumpkin pie, pumpkin cookies, pumpkin bread, pumpkin soup... The canned stuff is fine, but this is cheaper (especially if you've got pumpkins lying around), fresher, and more fun.

Here are a few tips for turning your autumn decor into food.

To select your pumpkins:
Know that smaller, heavier, and harder=better. In other words, use little sugar pumpkins, not Jack-o-Lantern pumpkins.

To roast or bake (Taken directly from The Joy of Cooking):
Bake halves, quarters, or slabs of pumpkin cut side down on a rimmed baking sheet. Remove the seeds and strings before baking. Add 1/4 inch water to the pan and cover the pan with aluminum foil. Bake in a 400 degree oven until tender when pierced. Halfway through the baking, pieces can be turned over with tongs, brushed with butter or mild oil, and sprinkled with brown sugar and nutmeg or other spice. Allow 30 to 45 minutes for small pieces.

Obviously these pieces of cooked pumpkin (or squash) make a delicious side dish for any dinner. Or, if you prefer, you can puree and save the pumpkin to be used in recipes.

To puree and preserve:
Scoop the roasted flesh out and puree in food processor. Freeze in ziploc bags, packed flat.

My favorite pumpkin recipes are:
Pumpkin Risotto
(I add mushrooms and almost die of happiness with every bite.)
and
Pumpkin Cookies

What are yours?
xo,
anne

Wednesday, October 27, 2010

Soup's On


In my book, there is nothing better for dinner on a cold night than hot soup and bread. Today I'm sharing some of my go-to recipes and tips for simple, warm, nutricious soup dinners.

First, make sure you have a great stock pot or dutch oven. I love pulling out our Le Creuset to make a big pot of soup. My husband scored ours at a Le Creuset outlet store that was going out of business when he was nineteen! Lucky me, I married into some great cookware. (You could try finding one at CSN. They have everything from barstools to cookware to lighting. See their Le Creuset selection here.)

Next, make sure you have some go-to bread recipes. Try this peasant bread recipe I posted last fall or Em's wheat bread recipe. It's also nice to have some great bread in your freezer for last minute ocassions. (I love the La Brea breads at Costco and they freeze beautifully).

Also, I like to keep things on hand that add a nice garnish to my soups. A little lemon juice, for example, can pep up a chicken soup. Parsley is great to have to sprinkle on top of most soups, and real Parmesan cheese is an absolute must in our fridge--it's so tasty on a warm soup!


Most importantly, you need some great, never-fail soup recipes. Here are some of my favorites:

I love Taylor's french onion soup and potato spinach soup. (I often use broccoli in place of spinach.)

Rebecca's tortellini soup is a favorite here as well.

Here is a great looking squash soup--how Autumny is that?

It's always yummy to serve a bowl of taco soup topped with cheese, sour cream, and avocado with chips.

And here is my version of 'pasta fazool.' I'm sure it's not super traditional, but it's my absolute favorite soup right now...so yummy.

Pasta e Fagioli

1 package bacon
1 yellow onion, chopped
2 carrots, peeled and chopped
2 celery stalks, chopped
3 large cloves garlic, minced
2 cans cannelini beans
2 cans diced tomatoes with juices
8 cups water or chicken broth (I usually do about half and half)
freshly ground pepper
1/2 pound small pasta shells

In a large soup pot, cook bacon on medium-low heat, until it renders its fat. Add the onions, carrots, celery, and garlic and cook, stirring often, until the vegetables have softened, about 5 minutes. Add the beans, the tomatoes, the water and broth, and simmer about 15 minutes.

In a separate pot, boil water and cook pasta.

To give the soup more body, remove 2 or 3 large spoonfuls of beans and vegetables, place in a blender, and puree until smooth. Return the puree to the pot. (I skip this step usually because I love a really brothy soup, but my husband prefers when I don't!)

Sometimes I throw in some chopped zucchini at this point, or whatever extra veggie I might want to use up. (Don't add zucc earlier, as it will get soggy.)

Once the soup is done, ladle into bowls, add a handful of the cooked pasta shells*, a generous sprinkle of fresh Parmesan, and a handful of fresh spinach.

*I've gotten in the habit of never cooking pasta within soup. If you do, it soaks up too much liquid and gets soggy and yuck. I always cook it separately and add it in. This is especially nice when you're eating it for lunch the next day.


Hoping these recipes warm you up,
anne