Showing posts with label around the house. Show all posts

Thursday, August 11, 2011

6th Street Design Bedroom Makeover--the Reveal

A few months ago Bloomer Jessie won an E-Design giveaway sponsored by Kirsten Krason of 6th Street Design School.

We showed you before pictures.

We showed you Kirsten's design board.

Today we give you the results:

Check out the before and after comparisons...

Old bedding: woodsman meets pink polka dots
New bedding: pillow fabrics suggested by Kirsten plus quilt made by Jessie

Old corner wall: multiple swatches of paintNew corner wall: a nice light gray color with artwork suggested by Kirsten plus a cozy reading nook (chair from Ikea), pillow made by Jessie
Old thrift store pink buffet:

Newly painted mint green buffet:Old curtains:
New curtains: fabric suggested by Kirsten


Old (joke of a) headboard:
New headboard: an old door-turned-headboard by Jessie's husband
Pretty amazing improvement, don't you think?!

Friday, July 15, 2011

The Friday Fray

My grandma lives right around the corner from me which is just one of the happiest things in my life. I adore her. Sometimes she invites us over for dinner - last weekend we ate with her and she served a delicious salad. We eat a lot of salad, so I'm always happy to find a new variation. Thought you might like the recipe...

Salad de Maison
(Yields 8 Servings)

2 heads romaine lettuce, washed and torn
2 c. cherry tomatoes, halved
1 c. swiss cheese, cubed or coarsely grated
1/3 c. parmesan cheese, shredded
2/3 c. slivered almonds, toasted
1/4 lb. cooked bacon, crumbled

I especially love this simple dressing:

Dressing
(best if made several hours ahead of time)

Juice of 1 lemon
1 tsp. salt
3/4 c. olive oil
3 cloves garlic
1/2 tsp. pepper

Top with croutons.


I hope you love that recipe.

On a somewhat more personal note, I've been spending a lot of time cleaning and then re-cleaning the same rooms and trying not to get frustrated about the fact that nothing stays done. Nothing. I know lots of people say, "just let the house go when your kids are little... blah, blah, blah." I can't do that. I need order. I don't coexist well with clutter. I'm a happier, nicer mom when the house is tidy. So I'm looking for that ever-elusive balance of what to let go and what to insist on. I need to do a better job of teaching/training the kids to clean up after themselves. I know to some degree I enable them because I get so sick of the mess, and I want so badly to avoid the conflict, that I just clean it up myself. Not so good.


Anyway, I hope you're finding answers to all of your parenting quandaries.
And I hope you're invited to a wonderful event this weekend and I hope the hostess asks you to bring the salad because {ding!} ... you're all set!


xoxo
em

Wednesday, March 23, 2011

DIY Headboard Tutorial with Heidi Smith of Budget Wise Home

Aren't many topics more fun than budget-friendly home decor, right? We're thrilled to have Heidi Smith of Budget Wise Home at Bloom today, sharing a DIY Headboard tutorial. Heidi believes that it's possible to have a beautiful home on a very tight budget and she proves that time and time again on her lovely blog. So happy she agreed to share a headboard how-to with us today, be sure to check out her blog for more inspiration...

I'm so excited to be guest posting here today! I've been working on our master bedroom so I thought I would share a headboard tutorial with you guys. I've had my eye on a few beautiful nailhead trim headboards from West Elm and Crate & Barrel, but the price tags are a little ridiculous for my budget. So I decided to make one myself and it was so easy.


Anyone can do this if you have the right tools.

Here is what you'll need:
  • Piece of 3/4 inch plywood (have the store cut it to size for you)

  • 1/2 inch foam (Use a 50% off coupon! This stuff is not cheap.)

  • Batting

  • Nailhead Trim Kit (I got mine from perfectfit.com)

  • Rubber Mallet

  • Spray Adhesive

  • Staple Gun & Staples

  • D-Ring Picture hanging hooks


Start by laying out your foam on the plywood and cutting it down to fit your board.


Working in small sections, spray the adhesive on the board and press your foam into place.


I then transferred the whole thing from my garage into my bedroom.


Lay out your batting and fabric over the board and cut it to size. Make sure you have at least 3 inches extra length around each side.


Layer your materials starting with the fabric (right side facing down), batting, and then the board (foam side down).


You'll want to cut the corners out a bit to make it easier to work with. I started with cutting out just a small section and then cut more as I went along to minimize the bulk in the back. If it's too bulky, it won't sit flat on the wall.


Secure everything to the back of the board with your staple gun. Make sure to pull the fabric and batting very tight as you go. I started by securing all sides with a few staples in the center. This helps to make sure the fabric is stretched evenly and there are no bunched parts. Then continue around the board until everything is secure.


Here is a look at the corners. There is no exact way to do it. Just pull your fabric tight, cut out what excess bulk you can, and go to town.


Time for the nailhead trim. This part took me a little practice and I did have to pull out a whole row and start over. Once I got the hang of it, it went pretty quick. So don't get discouraged if you are having a hard time at first. The hard part was getting it straight. With a trim kit, you only have to nail in every 5th nail, so it's much easier to get it straight as opposed to nailing each one in separately. I found that it works best to nail in about 3 holes and then stand back to make sure it looks straight from a distance. This is much easier than realizing your row isn't straight after you've finished. It is not fun to pull these out.


Make sure you use a rubber mallet to hammer in the nails. A regular hammer will scratch the nails and take off the finish. My cute little boy helped me hold everything in place so I could take this picture--It's impossible to take a picture and hammer in a nail at the same time.


I didn't take a picture of the hooks, but it's really simple. Use D-ring picture hanging hooks and attach them to the back of the headboard. Secure screws into studs in the wall and hang the hooks on the nails.

Here is it is all finished:

My total cost for all supplies and fabric was $100.00 for a King size bed. The West Elm one would have cost me $509.00 for that size. I'm so happy with the results. Our bed finally has some presence and I love the finished look it gives the room.

Wednesday, January 26, 2011

Making It Personal with Bloom Guest Dana of House*Tweaking

We are so excited to welcome Dana to Bloom today. Her beautiful blog is click after click of inspiration for your interiors. We're thrilled to soak up some of her style smarts at Bloom...

Hi to all you bloomers! Dana from House*Tweaking here. So happy to contribute on Bloom!
Today, I'd like to suggest a few easy ways to make your home more personal...and I'm not talking about a clutter of propped-up picture frames on every horizontal surface. If you're like me, you don't want to dust those every week anyway...or risk them being knocked over by lil' hands either. To demonstrate each idea, I'll be showing you examples from my own home. Let's get to it!

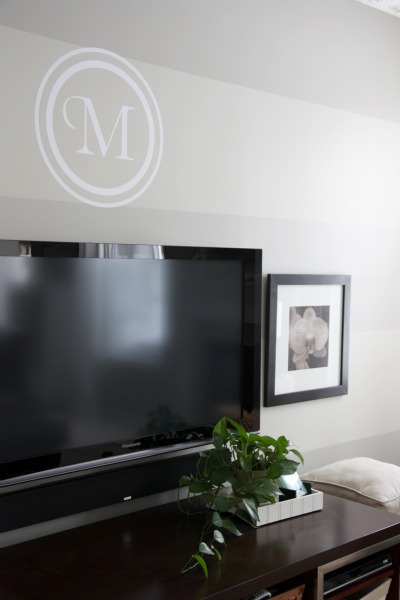
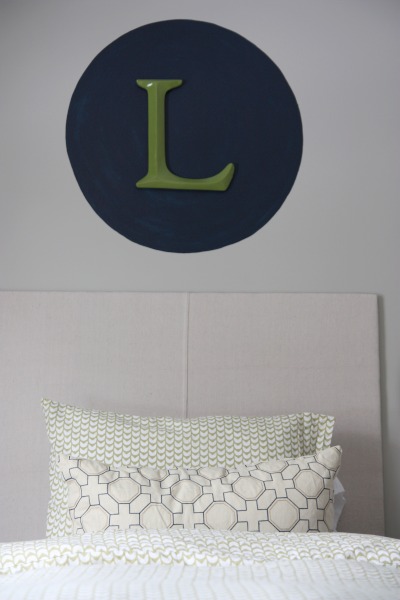
*Wall monograms - Displaying the first letter of your {or other household members'} first or last name is a great way to add some personality to bare walls. Whether you apply vinyl decals {such as the one over our TV} or paint and hang your own version {like the ones in my sons' shared room}, wall monograms can lend a sense of sophistication and even act as a focal point.


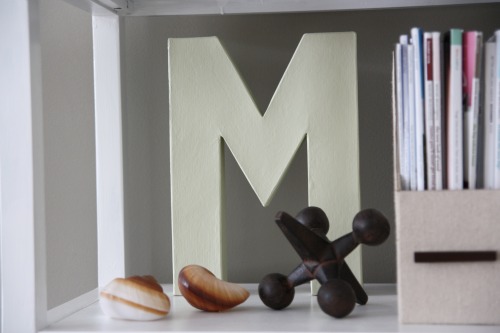
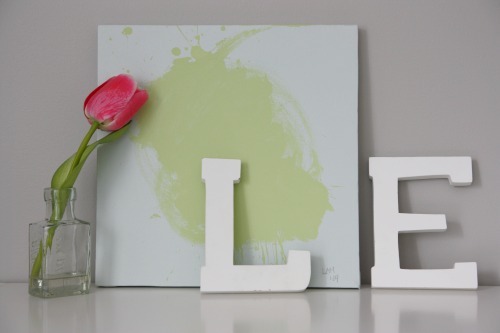
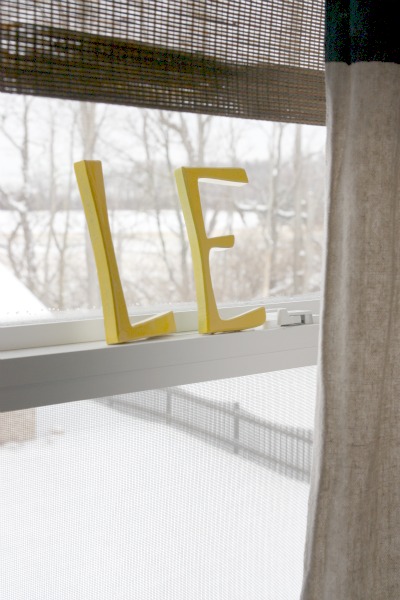
*Add characters - For a more casual and playful feel, self-standing wooden or paper maché letters can be quickly added to your decor. Simply prop one up on a shelf or lean them on a bookcase or windowsill. The best part? They're totally noncommittal. Take them away when you get bored or need to repurpose the room.


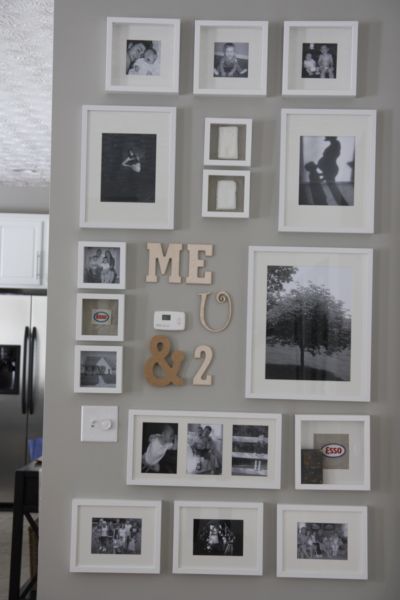
*Candid camera - Break the mold and resist the urge to only showcase professionally photographed family pictures. Sift through photos taken by yourself or other family members and edit them down to favorites that document real life. Have them printed in black & white and display them in similar frames for a big impact family photo wall.


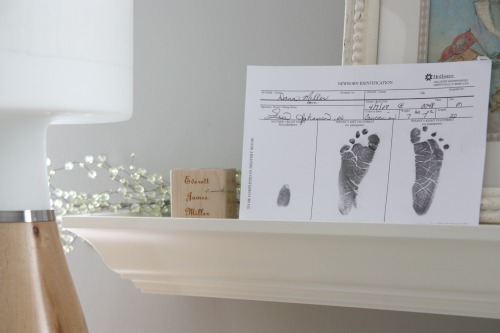
*Keep{sake} it simple - Choose only a handful of keepsakes to put on display. If you show off every single one, things can start to feel cluttered and less special real quickly. Family heirlooms {like Grandpa's old gas station overalls patch or Papa's bible from the war} and baby mementos {engraved blocks, birth documents and pressed clay footprints} are good go-to ideas.


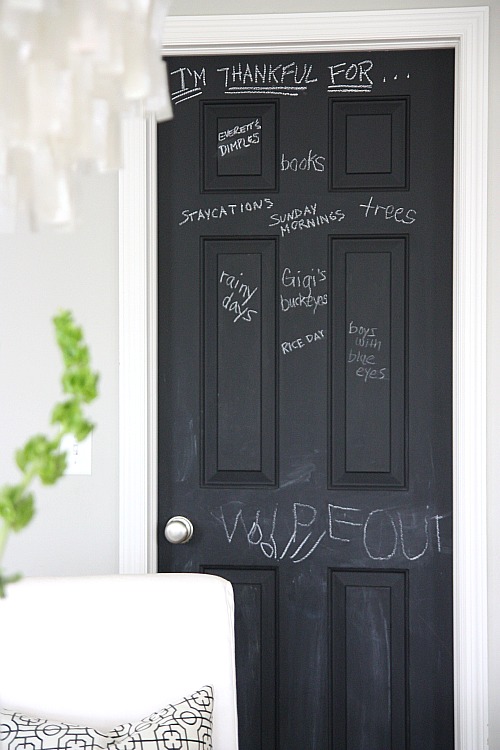
*Chalk one up - Find a sliver of wall space or an unassuming door and paint it with chalkboard paint. Leave family notes, jot down grocery items, write inspirational quotes, let the kids draw and make 'thankful for' lists. Use only white chalk for easier clean up.


*Make it meaningful - Take a phrase from a favorite song, book or movie and turn it into art. Use a projector to transfer the font onto a wall or fabric for large scale wall art.


I hope I've given you some new ideas that will help you to make your house your home. Thinking outside the box when adding personality to your home can make for an interesting and stylish space. Make your home as unique as your family is!


Thanks for having me, Emily & Anne!


images: all Dana Miller for House*Tweaking

Wednesday, January 19, 2011

Organized Part II


{thanks, Martha}

I'm pleased to report that the organizational bug that bit me earlier this month is still buzzing around. Unfortunately, it hasn't been the only bug buzzing. I went away with my lovie this weekend and caught something ugly. Feeling mostly better, but a little behind on life. And frustrated at the number of projects I'd like to tackle, compared with the tiny margin of spare time I have to do them in. You can relate? And when I say projects I'm not talking about superfluous needlepoint or unnecessary redecorating - I'm talking about cleaning out my pantry and organizing my over-rummaged cupboards. So I had slumped to actual self-pity about this predicament tonight (dumb, I know) and I was all a dither with eye rolls and huffy sighs, and then I thought ... wait.

I may not have half-a-day to organize my kitchen top to bottom, but I have six minutes right now while the bread is kneading. And I started working. One cupboard. And by the time the six-minute buzzer was buzzing, I was done. And then I had 20 minutes while the bread rose and the oven heated. So I moved on to the pantry. And by the time I put the loaves in, my pantry was nearly ship-shape. So my organization tip to you is this: just start. Even if you only have 5 tiny minutes, choose one tiny space and start sorting. You'll be surprised at how much you can do. And how motivated you feel to put the crumbs of your time towards productivity.

Here are a few more tips from some friends of Bloom:
(see Getting Oragnized Part I here)

Abbie on playroom organization:


My mom is going to laugh when she reads this because my room was an epic MESS growing up. But I've learned a few tips that have helped keep my kids’ room/playroom clean (until they grow up and I have no control, but for now…).
  • When they get new toys for Christmas or birthday, we get to donate some old toys.
  • A table! Get an old kitchen table for your playroom. Seriously, best idea ever! Great for working while they play and great for storage.
  • Organize like with like, and keep it that way. I know, this is a duh, but it's the foundation of any well organized space.
  • Give them little places to put those random little toys they’re really attached to (and throw away the other random little toys).
  • Keep all the toys in their room. I used to have a small basket in our living room and it drove me crazy. Now we have a rule: all toys stay in their room.
  • Hide toys! I love this idea the very most. Hide toys that don’t get played with everyday, but you’re not ready to part with. It’s like Christmas when you bring them back out.
Jordan had this to say about motivation for cleanliness:

"one thing I wanted to share regarding keeping a tidy home: Have people over! It is the only way I ever feel motivated to really declutter, deep-clean, and make my home presentable and comfortable. Do it over and over again!"


Gina (Lettergirl) offers this helpful tip for self/life management:

A few months ago I started something new to improve my time management – I got the idea from a tip given to me by one of my blog readers, and then I tweaked it over a couple of months to make it work for me. The idea is pretty simple: a regularly scheduled personal “staff meeting.” My blog chum holds her own meeting once a week; I have found that monthly works best for me. I sit down early in the month (preferably at a local coffee shop: there are fewer distractions, and it feels like a treat) and write out all the things I need/want to accomplish that month. I have developed a little chart with sections for work projects, work administration, personal stuff, shopping list, and an extra column for “if I have the time.” Because I am self-employed, and work from home, it is easy for my work & home life to overlap; I like to go grocery shopping during the day, and I don’t mind doing work at 6am. But that can also wreak havoc with my time management! By writing everything down at the beginning of the month, from projects at work to buying a new thermos for my son’s lunchbox, I get all the details down on paper, which gives my mind the freedom to actually get things done. I’m not dwelling on the small stuff, and hopefully I’m forgetting less too (or at least making fewer trips to Target). And I love the sense of accomplishment that comes from crossing items off the list! (For the record, I have restrained myself from designing a pretty chart for my monthly meetings. I use an easy-to-carry-around notebook…granted, it is a pretty notebook.)

Kerstin offered the following tips:

Use the space you have

1 year ago we moved into a bigger house but my kitchen is considerably smaller in storage space. I have 4 drawers and 2 of them are really deep awkward spaces! I had to get really creative on how to store my kitchen items (not to mention food!) On my pantry door I hung wire racks to hold some of my spices and foil, wax paper and plastic wrap. These were just cheap white racks from Wal-Mart that I spray painted with brushed silver nickel spray paint (1 coat of spray primer in gray first). I bought a plate organizer for my cookie sheets and a stacked spice rack for my peanut butter, syrup, agave, etc.

I have a lot of holiday platters and plates and it always makes me nervous to put them in a tote in the garage or attic so I store them on top of my cupboards. There is a little groove and you can’t see them at all!

A cleaning tip: I set the timer for 10 minutes, put on some music, and see how much I get done it 10 minutes. I am always amazed at how much I can accomplish and it goes fast! It works because as moms we often don't get more than 10 minutes of uninterruption!

We have an Organization Overhaul going on at my house right now. I am cleaning out one cupboard per day. I am getting rid of things we don't use and getting things back in order. It's quick and painless. Next I am moving on to closets!


We've still got more helpful ideas to share, so be sure to check back...
In the mean time, we'd love to know what's helping you get/stay organized.