


Hi. My name is Joni, and I sew. I was thrilled when Anne invited me to post a little sewing snippet here on Bloom.
With the holidays quickly sneaking up on us, I thought I'd share a tutorial for a quick and easy sewing project perfect for a teacher's gift, a thank you to a friend, or a housewarming gift for that kind person who is cooking you Thanksgiving dinner. This is a fun project if you are an experienced sewer, sewing challenged, or somewhere in between. Everyone's welcome here.
Embellished Kitchen Towel

Let's start cutting:
(These instructions will give you a 4" border. If you'd like to do it differently, here's the formula: Take the width of the border you want to have, double it and add 1 inch. Measure the short side of the towel and add 2 inches. Cut your fabric to these specifications. For instance, I wanted a 4 inch border and my towel measured 16 3/4" across, so I cut my fabric 9"x18 3/4". Got me? )
For the loop, cut a piece 5 1/2"x2". Measure the short side of your towel and add 2 inches. For the border, cut a piece that is 9"x that measurement.
Here we go...
For the loop:


Hoorah! You're done.
Thank you, Joni! We are so happy you shared some of your fabulosity with all of us! Dearest readers, don't miss Joni's darling handmade goods when you're thinking about Christmas this year. Again, her etsy shop is HERE.
- For the fabric, regular quilting cotton works best. This is the perfect project for those scrap pieces in your stash! You'll need one piece measuring about 9"x19" and another piece 5 1/2"x 2" for each towel.
- I like to use the organic barmop towels from Target. I love the look and feel of them, and they are only about $5 for a pack of 4. I've tried other towels, and these are my favorite. But, any kitchen towel with some body will do.

Let's start cutting:
(These instructions will give you a 4" border. If you'd like to do it differently, here's the formula: Take the width of the border you want to have, double it and add 1 inch. Measure the short side of the towel and add 2 inches. Cut your fabric to these specifications. For instance, I wanted a 4 inch border and my towel measured 16 3/4" across, so I cut my fabric 9"x18 3/4". Got me? )
For the loop, cut a piece 5 1/2"x2". Measure the short side of your towel and add 2 inches. For the border, cut a piece that is 9"x that measurement.
Here we go...
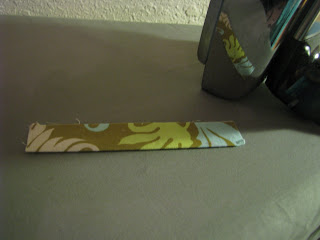
For the loop:
- Press it in half with wrong sides together.
- Open it and press each side to meet the crease in the center. Press.


- Fold it in half, and press again. Stitch close to the edge (1/8") to close it up. Set this aside for now.


- Lay your towel out flat, and place your fabric (centered) with the right side down, so that the distance between the edge of the fabric and the bottom towel edge is 3 3/4". Pin the fabric in place and sew using a 1/4" seam, stopping and starting about an inch from each edge of the towel's edge.


- Fold the fabric down, and PRESS. (Pressing well makes ALL the difference...)


- Flip over the towel and fold up the fabric. Fold under the raw edge so that it exactly matches the stitches you've just made and PRESS. If you take the time to do this just right, it will make your stitches nice and even on both sides of the towel, and save you some unpicking later.

- Center your loop, tucking the ends under the border fabric making it the length that you want.
 Pin and stitch across 1/8" from the fabric's edge, leaving the inch unstitched on each end as before.

- Now, tuck the raw ends under so that they are even with the towel's edge. If your fabric is a little long, just trim it a little. No worries. And again, PRESS.

- Starting where your stitching left off, stitch (1/8") to 1/8" from the edge, pivot, and stitch to the bottom, backstitching at the end. Repeat on the other side.


Hoorah! You're done.
Whether you decide to tie one of these towels to a cute hand soap, or group several of them together as a set, they make a darling gift.
Happy sewing!
Thank you, Joni! We are so happy you shared some of your fabulosity with all of us! Dearest readers, don't miss Joni's darling handmade goods when you're thinking about Christmas this year. Again, her etsy shop is HERE.


14 comments:
This is a great, simple idea that I am going to put to use. Thank you, Joni. And thank you, Bloom!
so cute. love a project that allows you to use up your scraps. love the simplicity (think I might even be able to do it!)
love the idea of giving a couple of them with a yummy soap.
thanks, joni!
Joni,
I love how cute these are.
I love your detailed tutorial (sewers like me need it all spelled out!).
I love the idea of these tied up with a handsoap. Let me say, that I received many an unusable gift as a teacher (and WAY too many treats!). I don't mean to sound ungrateful. I just mean to say-- gifts like this were SO appreciated and cherished.
Thanks!
I will definitely be making these as part of my handmade Christmas this year. Hope you don't mind getting one!
SO cute! I may have to try some of those!
I love these! So cute!
I just made my first one and I had one question that I know must be obvious, but I'm just not seeing it! :) Why the loop? What's it for?
It's to hang on a cabinet knob. :)
Its very good looking and I am going to make it too. Thanks
Towel Digitizing is most of the popular business. Towel digitizing is done with the help of latest technology and machinery. Towel Digitizing
Do you have a photo of what the loop looks like on the towel when hanging? I can't figure out where the loop is.
I agree with a lot of the points you made in this article. If you are looking for the Bar Mop Towels, then visit wi-supply.com. I appreciate the work you have put into this and hope you continue writing on this subject.
Do both ends of the towel have fabric sewed on? Can you post a photo of the whole towel opened up?
Very informable blog.
Very useful, detailed resource& information from this blogpost on Housewarming Gift Ideas. This information is needed to my clients - Since we do Bulk Gifting of Housewarming Gifts team. Thanks for sharing!
Post a Comment